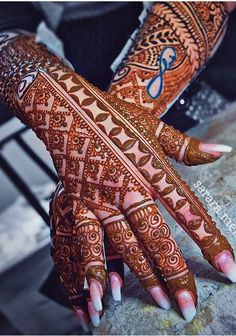
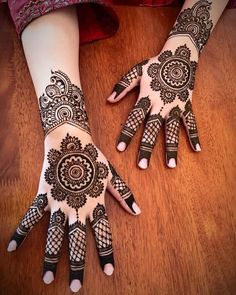
Best 10 Eid Special easy floral mehndi design


The coronavirus crisis is at its peak in India. With record surging cases, the city-to-city oxygen crisis has arisen. There has been an outcry across the country. The new strain of COVID-19 is to be blamed for this. As reported, it is quite dangerous and this time the symptoms of the deadly virus are visible after 25% of the lungs are damaged which results in troubled breathing. It is being observed that a high percentage of patients are having difficulty in breathing and their oxygen level is decreasing rapidly. Within 2 to 3 days it reaches below 80 and in such a situation, immediate oxygen supply is required. If oxygen is not available during this period, the situation becomes very serious for the patient.
With an increased demand for oxygen supply, it is important to see that such a situation can be averted. In the latest Standard Operating Procedure (SOP) for Covid-19 released by AIIMS Patna, doctors have stressed that proning can help manage blood oxygen levels. Ministry of Health & Family Welfare Government of India also shared a guide on proning self-care techniques. Here are FAQ and techniques of proning
Proning is the process of turning a patient with precise, safe motions, from their back onto their abdomen (stomach), so the individual is lying face down. Proning is a medically accepted position to improves breathing comfort and oxygenation. It is extremely beneficial in COVID-19 patients with compromised breathing comfort, especially during home isolation.
For self-proning, you will need 4-5 pillows. You will be required to alterate lying position regularly and it is best is to not spend more than 30 minutes in each position.

Disclaimer: This content is created and published for informational purposes only. It is
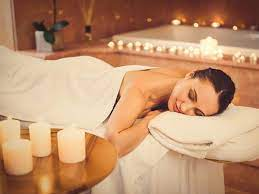
At this point, I think we can all agree that there’s nothing particularly relaxing about life during a pandemic. And as nice as a trip to the salon or spa sounds right now, for many of us it’s still out of the question!
So I’m proposing that we all devote a day (or a half-day, or even an hour!) to rest and relaxation in the form of an at-home “spa day.” And to help you make it happen, today I’m sharing all my best tips and DIYs for having a perfect spa day at home!
And if you have any tips or tricks for recreating a spa-like experience for a spa day at home, share them with us in a comment at the end of this post! :-)

First things first, start by setting the mood and recreating a spa atmosphere at home! To find relaxing spa music, look for ready-made playlists on your favorite streaming service.
Smells are another important part of the spa atmosphere, so grab your diffuser if you have one! Diffusing lavender essential oil is always relaxing, but nothing smells more like a spa than eucalyptus!
If you don’t have a diffuser at home, lighting a nice-smelling candle will get the job done just as well. (You can even make your own candle if you’re feeling crafty!)

Once you’ve recreated the smells and sounds of the spa, it’s time to gather up the amenities that will make your at-home spa experience truly special! Grab your fluffiest towels, your favorite slippers, and your best bath robe—comfort is the name of the game here!
One of my favorite spa amenities to recreate at home are infused “spa waters.” Flavoring a pitcher of water with strawberries and mint, citrus and cucumbers, or berries will make your experience more luxurious and help keep you hydrated!

The mood is set and you’ve got your amenities ready, so now it’s time for a few relaxing DIY spa treatments! I’ve shared a lot of bath and beauty DIYs over the years, so check out the links below to find the perfect treatments for your skin, nails, and hair.
Some treatments require a bit more prep work than others, so it’s a good idea to choose them beforehand in case you need time to gather your supplies.
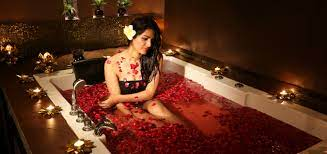
Some DIY spa treatments can get a bit messy, so a bath or shower might be in order at this stage! And in my opinion, there’s no better way to finish your spa day than with a long soak in the tub to get cleaned up!
Try one of these bath-related DIYs to take your soak in the tub to a new level of pampering and relaxation
So there you have it, your recipe for the perfect spa day at home! I hope you’ll take a little time for yourself this week, and that your spa day leaves you feeling refreshed, recharged, and rejuvenated! :-)
What’s your favorite way to recreate a spa experience at home?
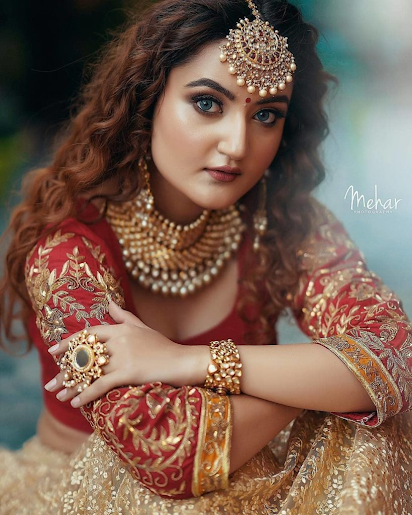
Our Favorite 5 Indian Bridal Makeup Looks

They say a girl’s biggest dream is to not just become a bride but to look the most breath-taking bride ever. To nail that dream, every bride to be remains on a constant lookout for that perfect Indian bridal makeup look.
We live in a world where everyday a new trend takes over. Same goes with different bridal makeup looks that flood the social media every day. But you need to be sure of how you want to look on your biggest day before choosing your bridal look.
So here we have compiled a list of top 51 Indian bridal makeup looks that we love.


If you are someone who doesn’t fit into the traditional bride look, then go with a bold bridal makeup look for your day. Accentuate the look with dark eyes and dark lips or one with a clean low bun. Girl you are ready for the wedding.

If you are someone who likes to keep everything simple and subdued, then going all bright and sweet will be your perfect style. What is better than going for peaches and pinks for that fresh and subtle look.
Let your makeup artist know how you want light eye makeup with peach pink lips. Subtle glow on your face with peach pink cheeks and messy hair locks on your face with flower bun will definitely leave the spectators swooning.


They say red is the colour of an Indian bride. True that but not everyone looks good or can carry red that well. If you are someone who loves red, then without thinking much go for bright red lips with light eye makeup. We promise you will make many heads turn.


Nothing can make you shine as glitters do. Specially since you are bride and all the shine is what you need. Be it glittery eye makeup or glitter lipstick, choice is yours to make.


I hope u enjoying this post


